Prerequisites
ATICA4CAPELLA is an addon for Capella MBSE. It requires previous installation of the Capella toolbench:
- The latest Capella version can be downloaded from here.
- ATICA4Capella currently supports Capella versions 5.2, 6.0 and 6.1.
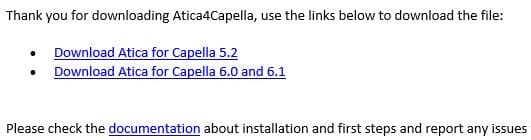
Download ATICA4CAPELLA
Follow this link to download and get started with ATICA4CAPELLA.
Note that currently two different releases are provided: Atica4Capella (5.2) and Atica4Capella (6+). Both links are provided after submitting the registration form:
Plugin installation
Atica4Capella assets are distributed as Update Site plugins. In order to install them, follow these steps:
- First download the zip file and place it somewhere in your local directories (no need to unzip).
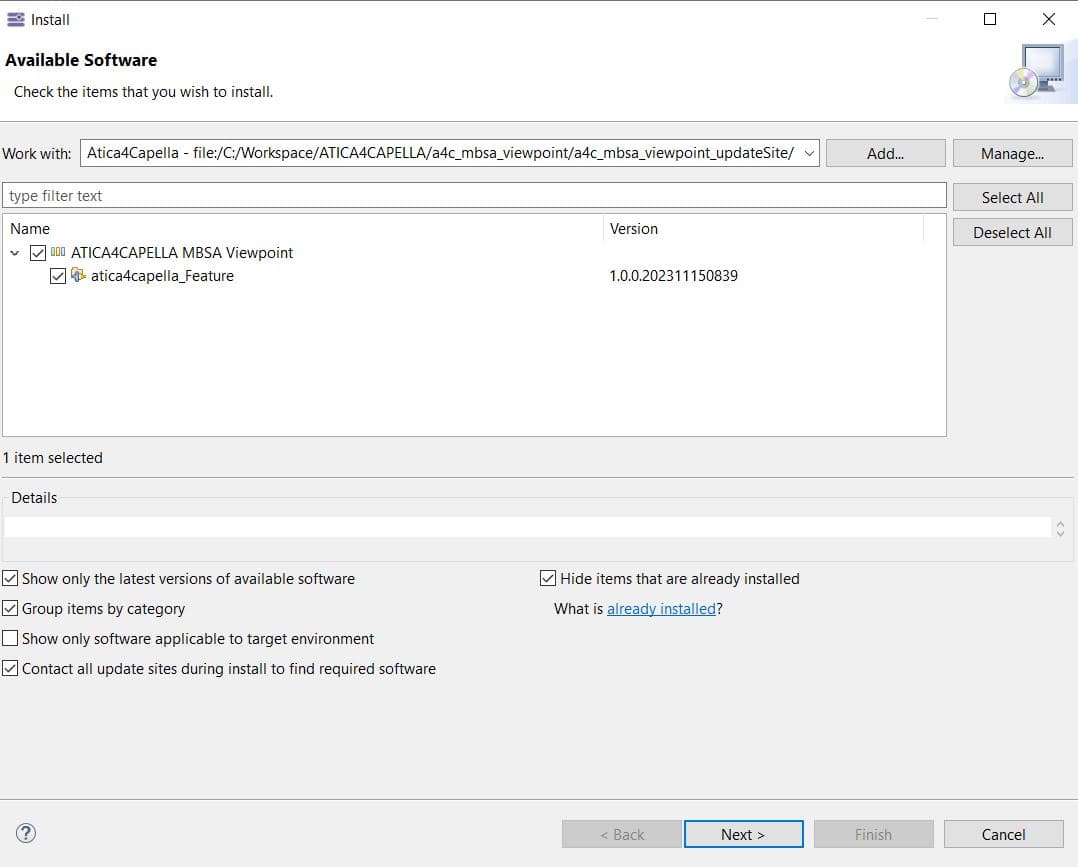
- Open Capella, go to
Help->Install New Software... - Install the plugin using the
Addbutton, selectArchiveand locate the zip file in your directory. You can save the location for later adding a name to it (optional).
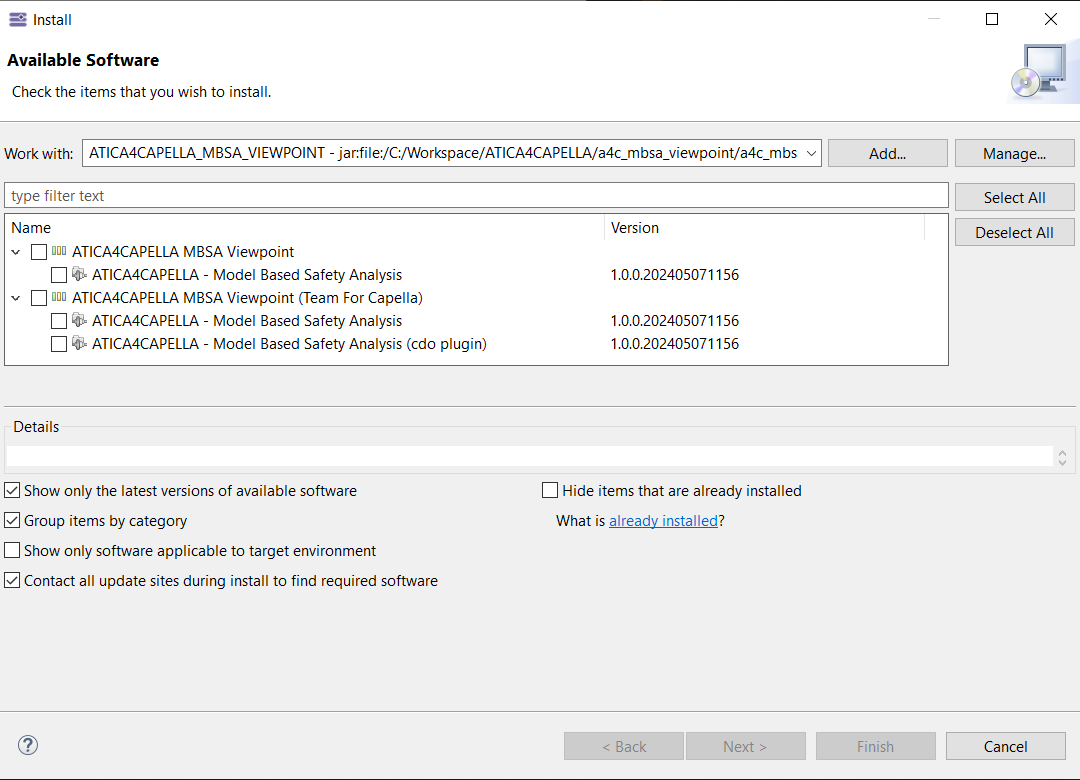
For users of Capella desktop application, check the first box. In case the collaborative version is needed to use ATICA together with Team For Capella, check the second box (more info here).
something like this will appear just after:
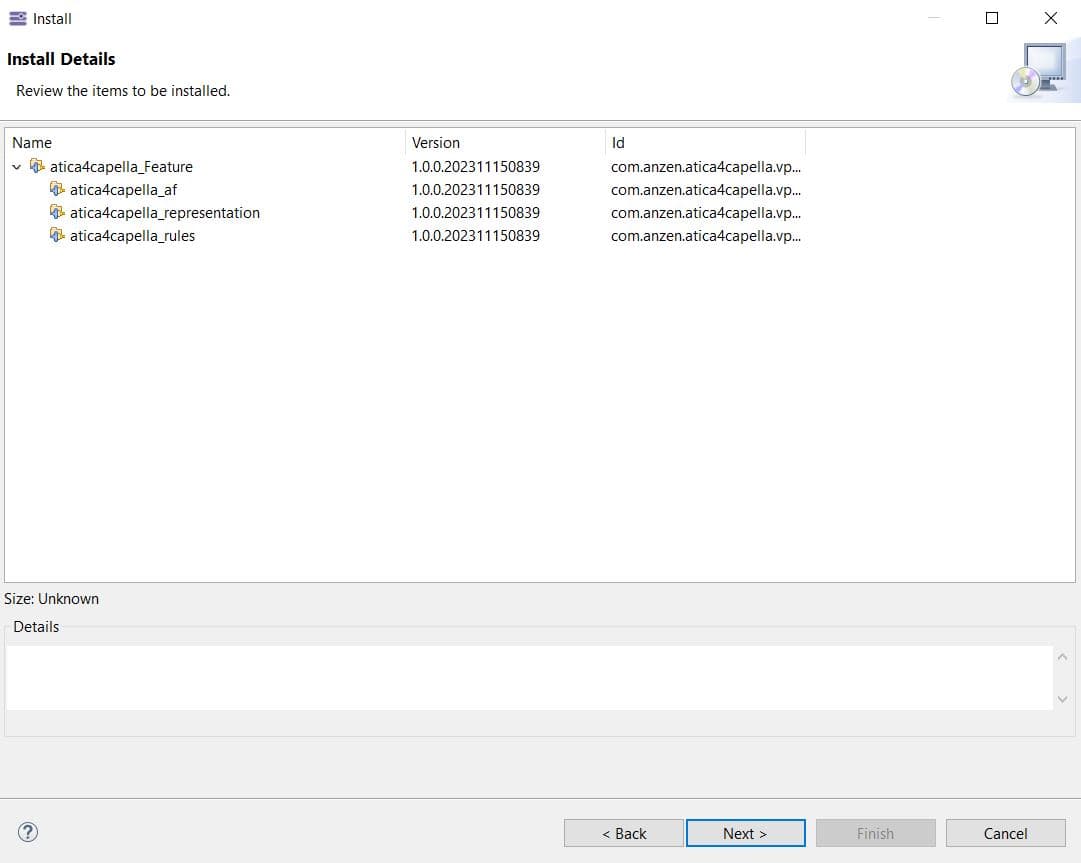
- Click
Next >, first a screen describing the contents to be installed will appear and just after the information about the software licence will be displayed.
| Plugin contents | Licence acceptance |
|---|---|
 | 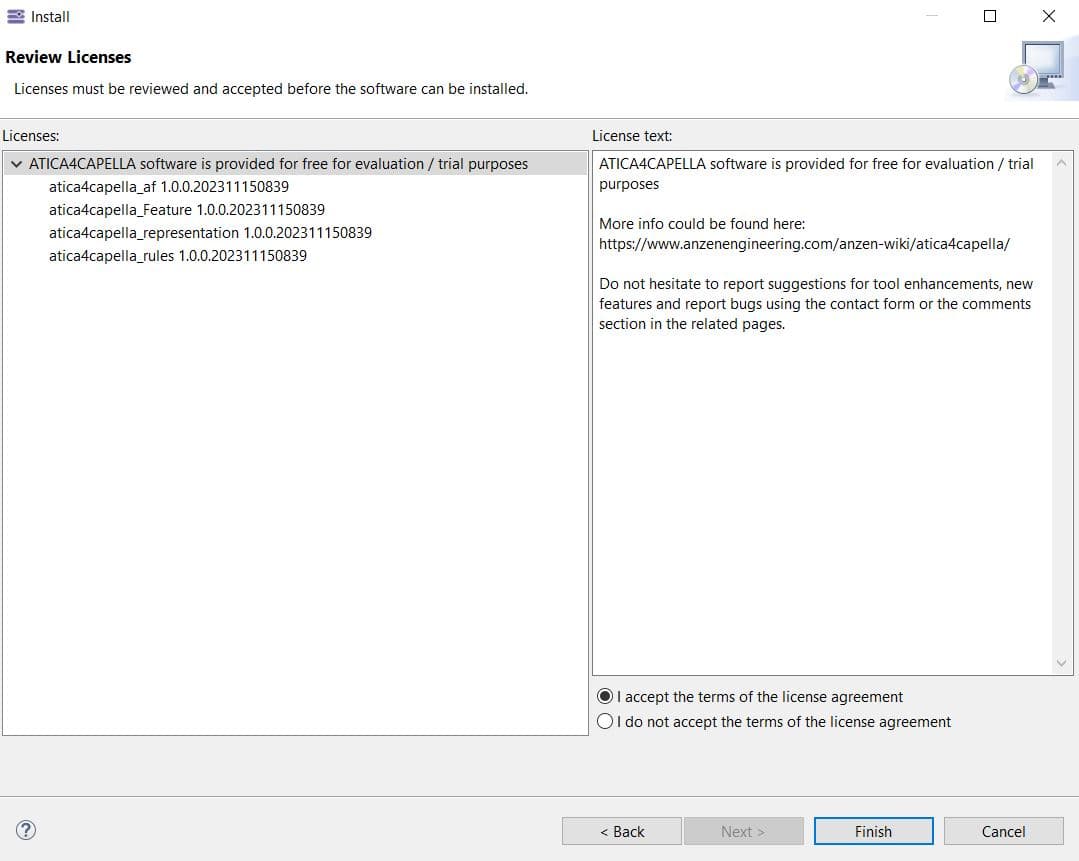 |
After this, Capella will need to be restarted in order to finalize the installation.
It is possible that Capella reports a warning about unknown software provider. The installation can be resumed, in case of issue please let us know.
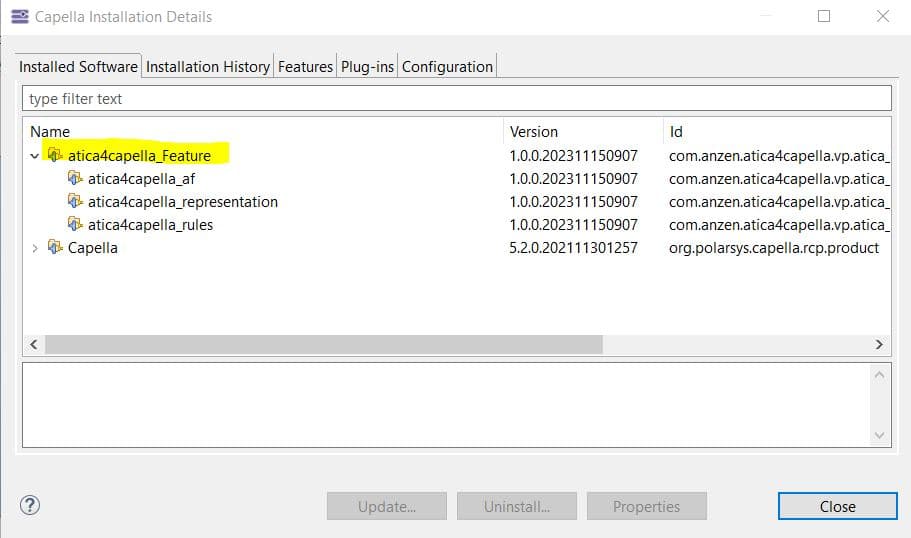
Quick check: after restarting, click on
Help->About Capella->Installation Details. Atica shall appear underInstalled Softwareand/orPlug-ins tab
Activate the viewpoints
In case the plugin is of the Viewpoint kind (extension of modelling features, custom diagrams and tables etc. ATICA4CAPELLA is a Viewpoint plugin), one more step is needed to finalize the activation of the plugin.
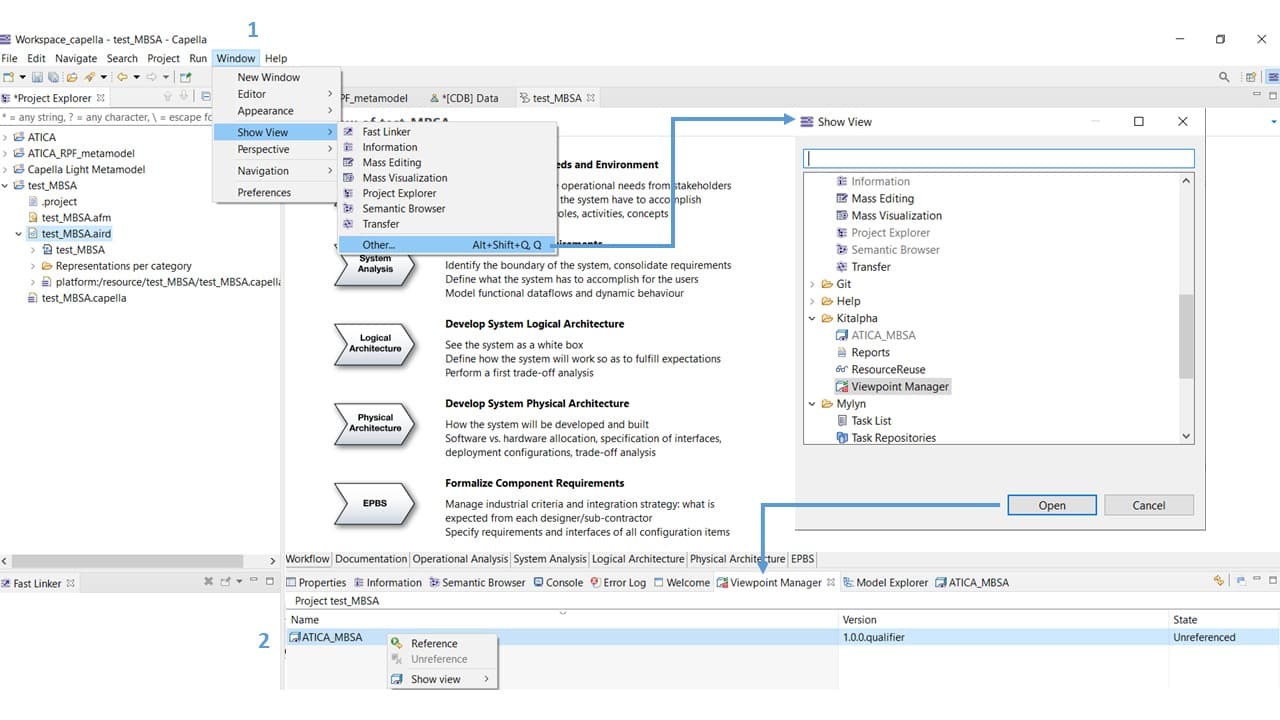
- Click on
Window / Show View / Other...and selectViewpoint Manager - A new window
Viewpoint Managerwill appear with the list of available viewpoints. Click on the system project (.aird file on the project tree) and then select the plugin, click right with the mouse and click onReference. This will activate the plugin.
Viewpoint selection
In most cases the viewpoint will be directly activated just after referencing it – if it is active, a new element named MBSA Package will appear under System Analysis. If it doesn’t appear, then manual selection of the viewpoint is required, check the following steps:
1. Click right on the .aird file and select Viewpoint Selection
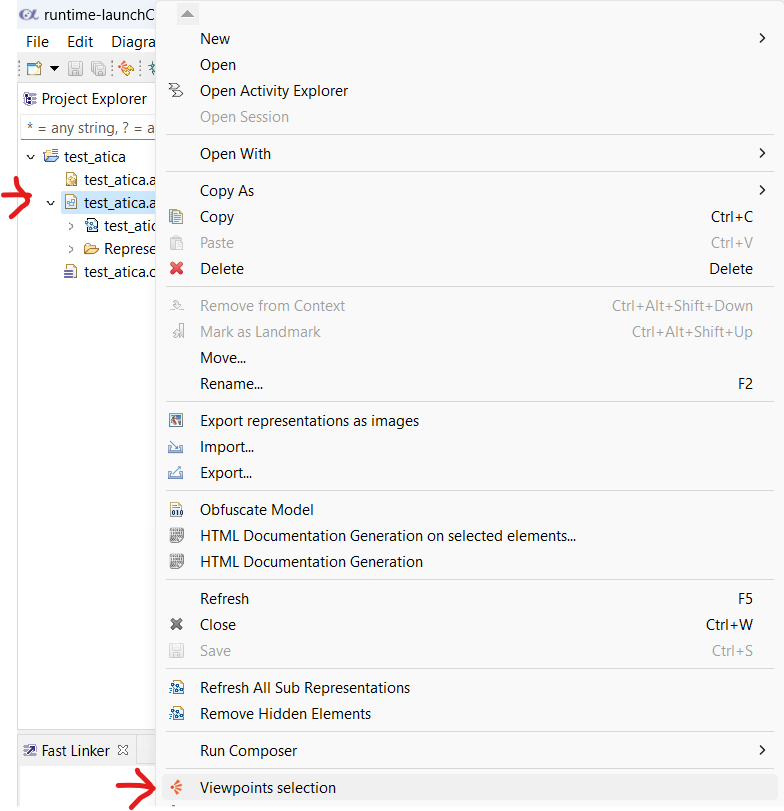
2. Make sure that ATICA_MBSA is checked.
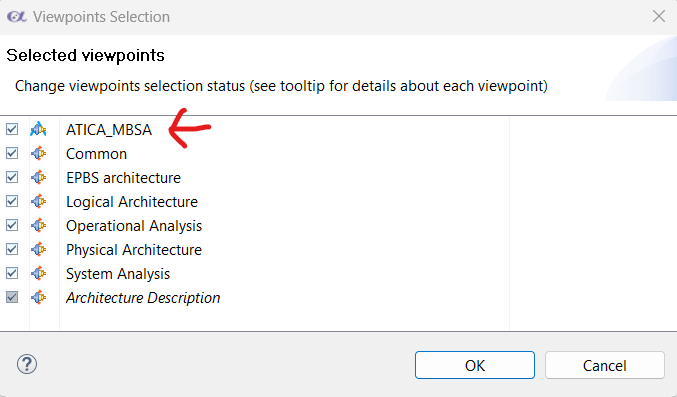
.
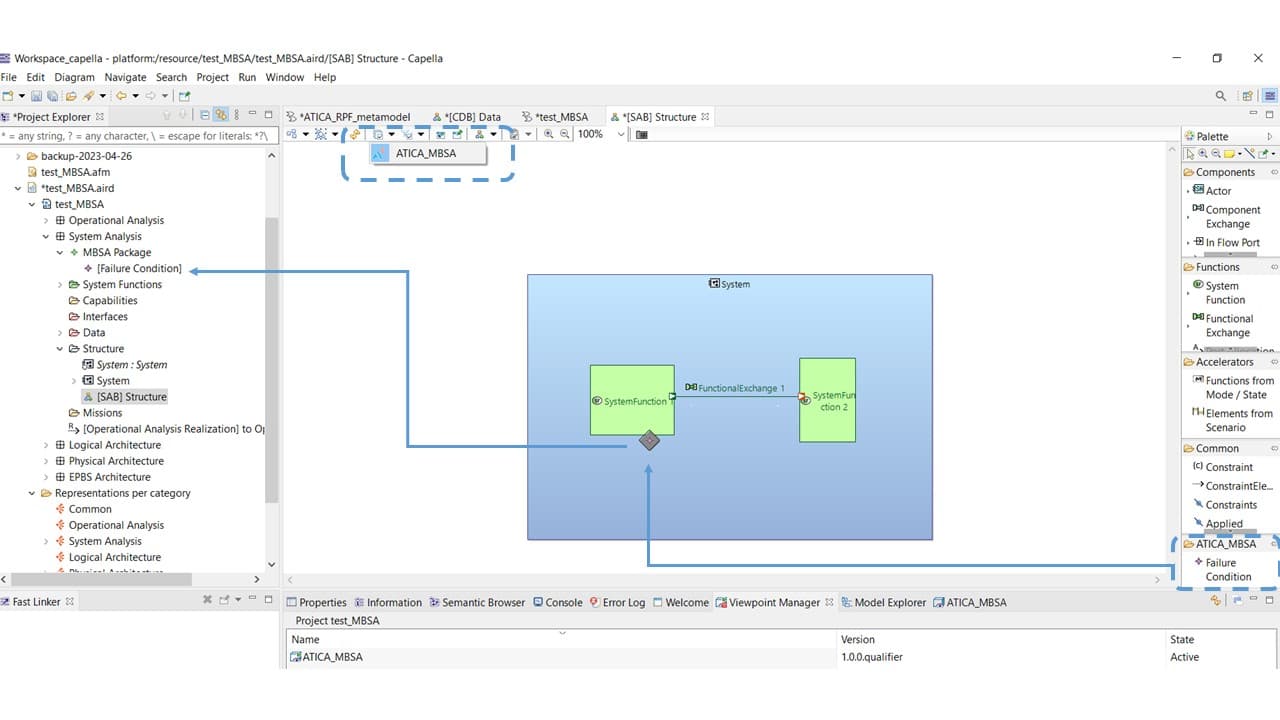
After activation, a folder named "MBSA Package" shall appear under System Analysis. Then, create a new System Architecture Blank diagram, activate the safety perspective (on the upper bar in the diagram) and the Failure Condition creator will appear in the diagram creator palette.
⚠️ Warning
If the plugin is deactivated, the “MBSA Package” folder will be removed with all its contents. Capella creates a backup copy of the project before removing all the new features enabled by the plugin.
For which version of Capella will Atica work with? I’m using version 5.2, and although Atica will install, it creates errors and makes Capella unusable.
Hello François,
Thank you for your feedback. Atica4Capella was initially developed under Capella 6.0 and was tested in versions 6.0 and 6.1.
We have just added a quick patch to make Atica4Capella also compatible with Capella 5.2. It is available now in the download page.
Thank you
Hello,
Should it also work for Capella 7.0, because I tried installing it, but it gives multiple errors, as it misses Missing requirement: eMDE Extension for ATICA_MBSA
Hello Rowan,
Capella 7.0 is not yet supported. Between Capella 6.1 and 7.0 a refactoring of certain legacy modules has been introduced and that requires a minor adaptation of ATICA that we have not started yet.
Should you have a specific need please get in touch so we can prioritize this aspect.
Thank you